September 13, 2013

Petal Block - The Six-Minute Circle Way

Here's my method for sewing these cute drop shaped petals in such a way that prints aren't all chopped up. This is an obvious knock-off of a commercial pattern, so please don't spread the link to this little tutorial around anywhere as I don't want to step on any toes. My goal with this block was to allow our bee to learn (or practice) a new technique while at the same time getting blocks for a quilt I'm excited to finish (let's face it - I don't really need another circle quilt). If I forgot something or anything is unclear, please let me know. Here goes nothing!

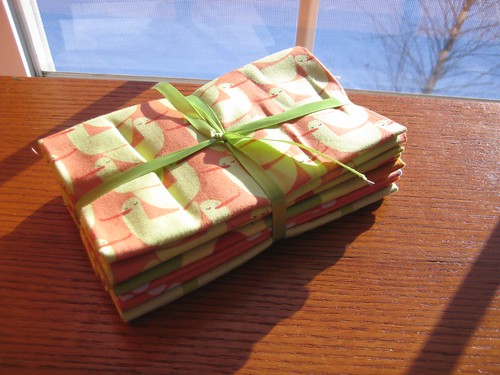
Included in your kits:

- freezer paper template
- glue stick
- white fabric for the back ground (approximately 9" x 35")
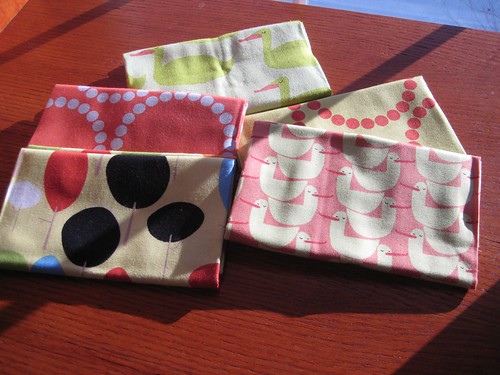
- a colorful print for the petals (at least 16" x 16")

Prep

- cut four 8.5" squares from your white fabric
- cut four 8" squares from your colorful print

Instructions

1. Using regular paper scissors, cut out the petal shape from the freezer paper to make your template.  (Don’t cut through the edges - it should look like a stencil when you’re done.)

2. Iron the template to the middle of a background square, shiny side down (template and fabric should be about the same size - if they're a little off, just focus on lining up the edges along the straight sides of the petal).  Don’t use steam to prevent the paper from getting all wrinkly.


3. Trim the fabric out of the middle of the stencil, leaving ~½” of seam allowance (it doesn’t have to be perfect - you’ll trim it down later).

left: scrap, right: keeper
4. Clip around the curve every ½” or so.  You want to get close, but not all the way to the edge of the freezer paper.  Also clip diagonally into the tip of the petal. There's no need to clip the straight edges.


5. Press the fabric back over the edge of the stencil with your iron.  Be careful not to burn yourself!

Pretend there's an iron in my other hand pressing those little tabs down.

This is what it will look like when you're done pressing.

6. Center a square of your printed petal fabric over the opening, right side down.


7. Lift up a section of the petal fabric, carefully spread the glue stick onto the little tabs you clipped (try not to get it onto the freezer paper, since you’ll be removing that in the next step and don’t want it to get too stuck), and press the petal fabric down to secure it.  Do a small section at a time (so the glue doesn't dry) and work around the whole petal until it is all glued in place.


8. Peel off the freezer paper.  (Be careful not to tear it since you’ll need to use the template for your other three petals too.)


9. Time to sew!  Start at the right angle of the petal tip (backstitch at the beginning and end to secure everything) and work your way around, sewing right along/in the folded edge of the background fabric.  It can be hard to see sometimes, so you may want to shine some extra light on your sewing area.  

Work slowly around the curve to make it go smoothly, and you may need to lift your presser foot and readjust periodically to keep going in the right direction.


10. You did it!!  Now just trim off the extra fabric in your seam allowance down to a little less than 1/4" all the way around.


11. Repeat to make four petal blocks, reusing your freezer paper template each time (you should be able to get four uses out of it, but it will start to get less “sticky” by the end).

12. Sew the four blocks together with a 1/4" seam allowance and press your seams open.


13. Congratulations, you finished the block! You're now a pinless piecing expert, so pour yourself a celebratory glass of wine. You deserve it!

March 20, 2011

an announcement

My blog has clearly been in hibernation for quite awhile, and I've decided to make it permanent (at least for now).  I've never really enjoyed blogging, and I'm pretty relieved to not have the pressure to keep doing something I'm just not that into.  If you want to keep up with my crafting, you can check out my Flickr feed and add me as a contact.  I might get back into blogging someday, but for now, this is goodbye.  (Well, sort of - I'm not going to stop reading blogs.)  Happy crafting!

February 9, 2011

resolutions and goals

Awhile ago I made a list of some of my sewing goals for the new year, and I didn't post them because I wanted a chance to let them simmer in the back of my mind, to see if they were really things I wanted to commit to trying to do.  Well, I looked them over, and I think I still agree.

  1. Quit being such a snob about fabric.  If it's cute (and it's quality), it shouldn't matter if it came from Wal-Mart or from the hands of Heather Ross herself.  Sure, I still prefer designer stuff, but I'm not going to look at everything else like it's somehow beneath me.
  2. Be more creative in my fabric selections.  Specifically, quit making quilts out of fabrics that are all from the same line.  It's boring.
  3. Do more with less.  With the weather being so cold, I'm often reluctant to take a trip to the store unless I really, really need to.  As a result, I've been working more and more with the supplies I have on hand, and I've been amazed to find that I can pretty much always make it work.  Plus, the less I spend on supplies, the more we can save for a house, or a trip to London, or a new camera.  Which brings me to...
  4. Take more pictures.  I hate my camera, and I hate the quality of pictures it takes, and thus, I never use it.  Since the Christmas fairies missed my memo about wanting cash this year, I'm stuck with the camera I've got for the foreseeable future, and I'm determined to make the most of it.  (I've been utilzing Picnik more and more for my photo editing, and it makes a world of difference, but that's a post for another day.)

I really do feel pretty good about focusing on trying to do these things over the coming months, but I'm curious to hear your thoughts about these goals too.  Feel free to share!

February 3, 2011

incredible fabric find!

Red Letter Day

Check out this completely adorable Red Letter Day fat quarter bundle... from JoAnn's.  I kid you not!  JoAnn's!  Even better, it's not one of the bundles where they give you two designer prints and then pad the rest with junk they're just trying to unload (I'll admit to buying some Heather Ross that way this summer). This is five gorgeous fat quarters, just waiting to be made into an adorable quilt for a little boy.

Red Letter Day

Just to make matters even better, the cashier swiped a coupon for me (I didn't even have one of my own), so I got all this goodness for a whopping $5.00.  Too good to be true, except that it is!

Before you get too jealous, I'll tell you that there were two of these bundles at the ghetto-looking JoAnn's on the corner of MacKenzie and Gravois in St. Louis, and I only bought one of them.

January 19, 2011

Quilting for a Cause

SFFscrapbeebutton

If you haven't heard, Sew Fresh Fabrics (a great fabric shop on Etsy) has come up with a brilliant idea. They're putting together little bundles of scraps from their shop and sending them to 16 quilters.  Each person will make one block from the scraps and send it back to the folks at Sew Fresh, who will then assemble the blocks into quilts for charities.  That's it!  It's just a one block, one month, ultra short-term, ultra-manageable commitment.

This month there was so much enthusiasm for the project they were able to put together TWO groups to make quilts for Project Linus, and I was lucky enough to make it into the second group.  We'll be making a boy quilt, and I can't wait to get my scraps and get started!

If you're interested in joining one of the future rounds, you can just send them an e-mail to get added to the list!  Check out this post for more info.